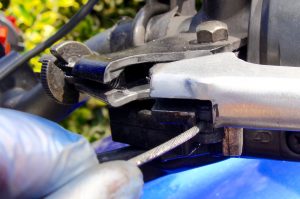
 A common job on any bike with a cable clutch that’s done a few thousand miles or worse has had a snapped cable. As time progresses cutch cables will stretch, requiring adjustment to bring in the slack, but eventually, they will need replacing. Similarly, if they have frayed or kinked preventing easy movement a replacement is the best course of action. Here I’ll walk you through step by step how to replace a clutch cable on a Yamaha Fazer FZS 600 (1999-2003), but other bikes will be fairly similar, tending to vary only on how the bottom end of the cable connects to the clutch.
Category: Maintenance
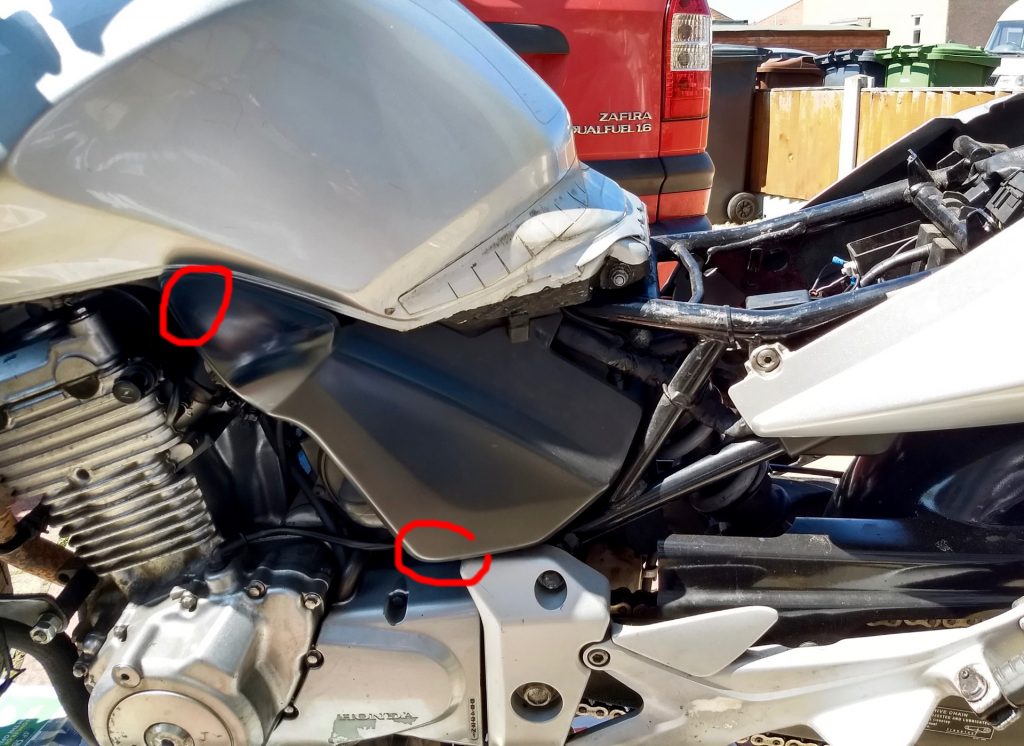
Standard service time and one of the key items to sort out is the air filter. The Haynes manual recommends this is replaced every 12000 miles or every 18 months. This is a really simply and quick item to change on the Honda CBF500, anyone can do it. Here I’ll give you a quick step by step guide on this task.
First, you need to remove the pillion and main seats. The main seat has a pair of 10mm bolts at its rear which can be accessed once the pillion seat has been removed. You then need to prise off the left hand side panel, this has two push fittings (highlighted in red below) in rubber gaskets and pops off with a firm pull.
Before you jump on your bike it’s highly recommended you run through a pre ride motorcycle check to ensure your bike is in good condition and won’t leave you in trouble. It can be crucial to catch anything unsafe or possibly even illegal (e.g. bald tyres), but also to keep tabs on general wear, tear and items due for servicing.
When to do Pre Ride Motorcycle Checks
It’s advisable to go through these before each ride or at least every few days if you ride daily. If your bike has been parked unused for several days or you’re planning a longer trip away, then definitely run through these checks. If you’re commuting daily on your motorbike you can probably go through this pre-ride motorcycle inspection every few days as you get more in tune with your bike’s condition and how often items need attention.
The POWDERS Motorcycle Check
Yep, it’s a funny acronym, but it will help you remember how to do motorcycle pre ride inspection, so you do not forget anything. This how to is one I was taught as part of my IAM training and can be found in the RoadCraft book.
We’ve all a dropped a bike or few, so easily done when new,
Your joy laying on it’s side, gone is all your pride,
Clutch lever broken in the fall, repeatedly you now stall,
Such a cheap repair, why did you not pack a spare?
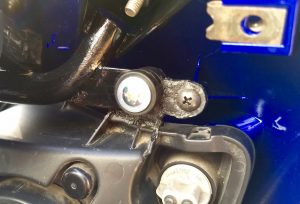
A snapped lever is so common after an embarrassing drop of your bike. But fear not, replacing a clutch lever is a such a simply and quick job, that anyone can do it. No need to pay for garage labour, let me show you how to replace it in 5 mins with just a spanner and screwdriver. This is on a Honda CBF500, but many other bikes will be near identical.
It’s also a good plan to order a couple of replacements (these non-genuine levers were only £6.50 from M&P), so you can stow one under your seat in case you find yourself inconveniently stuck.
Note: this guide is for traditional cable clutches and not a hydraulic clutch.
In my recent crash I smashed up the headlight cluster of the Fazer. Unfortunately this item alone is £250 brand new, however I did find a much cheaper used one from a breaker, albeit missing one mounting lug. But I had the foresight to gather up many pieces from the crash, including some of the bust off lugs from my smashed lights. So my plan was to the weld a bust lug to my newly acquired lights, to get back up and running for not too much money.
Plastic welding is nowhere near as difficult as you may think and doesn’t need any expensive materials. You just need a good soldering iron, some cable ties and staples. The technique I followed was the outlined below in this video by Delboy’s Garage, do watch his howto and subscribe to his channel, he’s got some sound advice.
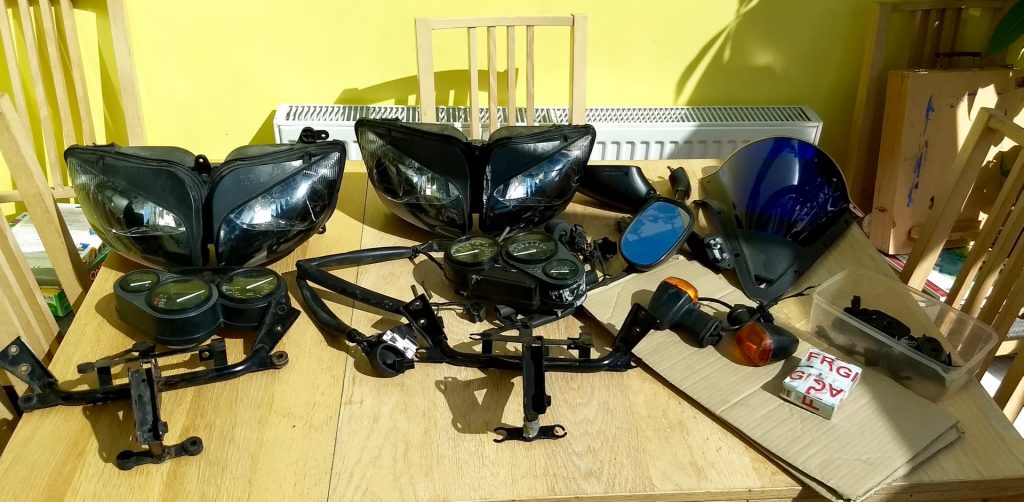
 Following my recent track day mishap, I’ve spent the last couple of weeks patching up the Fazer. It was tough to decide what the best plan, whether to repair back to stock, go naked/streetfighter or just flog it for spares. Especially tough when it’s only worth around £1.5k and will need to be traded in shortly due to the upcoming London ULEZ in one and half years time.
The damage, although cosmetic was extensive, the fairing plastic had disintegrated, the fairing bracket was about to snap, every mounting lug on the light cluster had snapped off, the clocks had lost a lug and the fuel gauge no longer worked. Those parts alone cost close on £1100 brand new… Even the street fighter option was less than straight forward, needing a new headlight, brackets, some different indicators, mirrors and some fabrication to mount the clocks.
Gone and binned the bike. Again. Was attending a (road skills) track day with ELAM & EuroTrax at Folembray in France, when I lost it during the last session.
I went too wide powering out of a gentle left-hander, kissed the grass which spooked me a little, but kept it upright. However I was out of shape and going too fast for the upcoming chicane, combined with a chap overtaking on my inside, I bottle it and tried to safely just run off rather than just tipping it extra hard to get around. Unfortunately, I was just carrying too much speed to keep it upright on the grass and down I went. The bike came fell hard on the front fairing and I went sliding before coming to rest sat on my ass.
Categories
Brembo Brake Disc and Fitting Faff
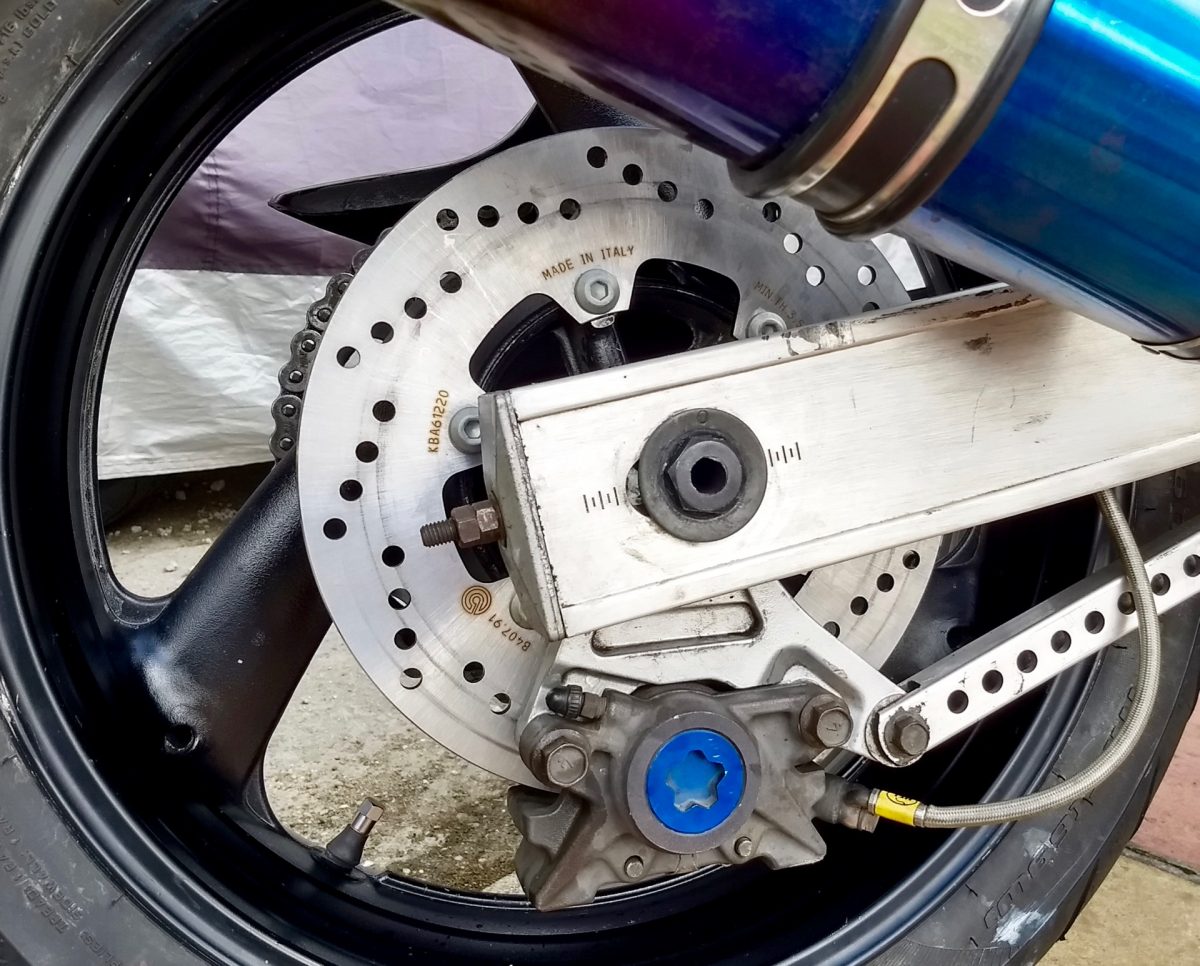
One of the downsides of pilings many miles onto a bike is the number of bigger non-routine items needing maintenance and replacement. This time it was the rear brake disc, whose thickness after 50,000 miles now measured below the service limit. Genuine Yamaha replacement discs are crazy money, so I picked up a Brembo disc from Demon Tweeks for £80. I figured Brembo was a decent brand and cheaper EBC discs seemed to have mixed reviews regarding longevity. I also picked a new set of bolts, thinking I’ll play it safe and be prepared. Little did I know how this would unfold.
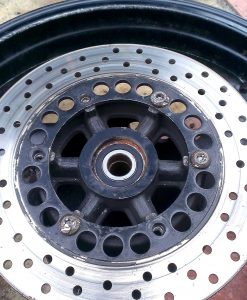 With the wheel removed and laid flat on some planks to protect the sprocket, I set out to remove the disc. For good measure I hammered the bolts to shock them and sprayed the bolts with some Wurth Rust-Off Ice spray, thinking the cold would help the bolts remove easily. Like shit they were going to come free easily! Totally seized on. More spray, more hitting, more tighten-loosen tweaking, and I managed to remove two. The other four rounded as though made of cheese. Lots of faffing ensues, attacking the bolt heads with mole grips and whatever else I had in my toolbox. I tried to drill out one, but then just sheered the bolt head off leaving the remains still firmly seized inside the wheel. At that point, I gave up before I trashed the wheel and dropped it off at my local garage – Wheelies in Rainham.
Categories
Fazer Clutch Service
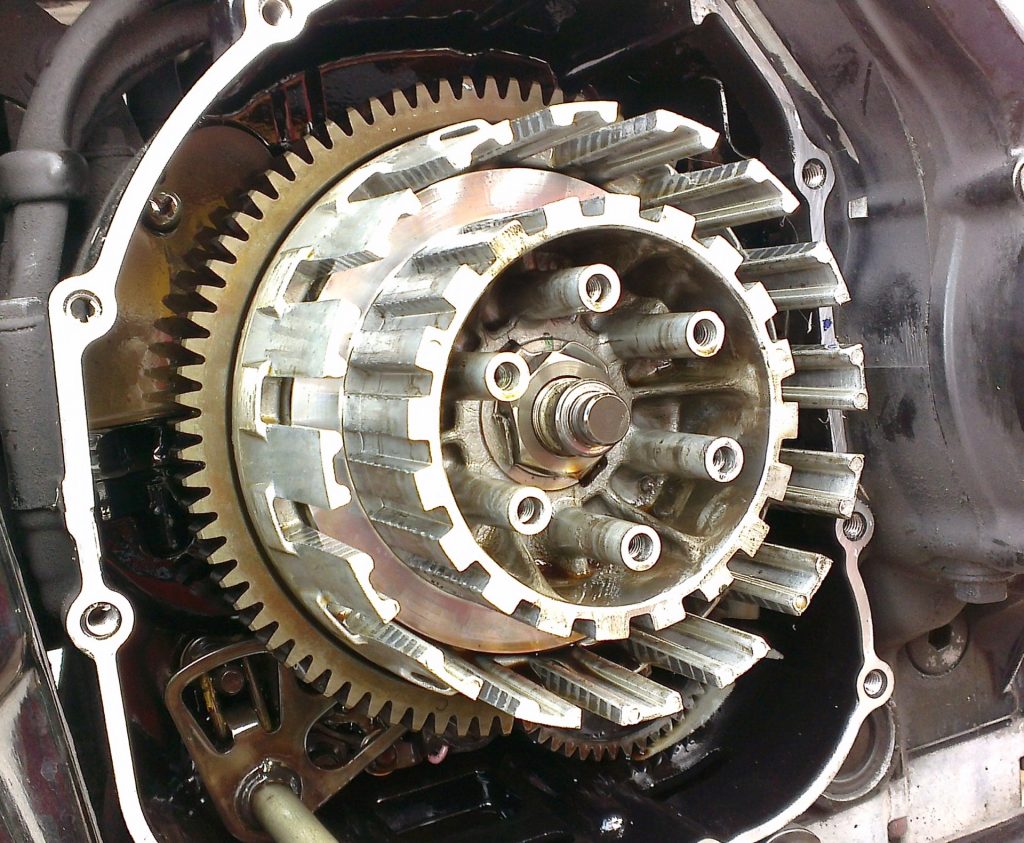
Just about to overtake and despatch a slow Sunday driver, you pull out, road clear, give the throttle a good twist and leave them for dust. But no – Grrrr! Clutch slip! The rev counter flies round, the engine screams for mercy, but you’re not going anywhere – eh?! Seconds later the clutch finally grips and wham! forward you finally shoot. A worn clutch slipping has to be one of the most infuriating issues to put up with.
Categories
Pinlock Fogging Up – Maintenance Time
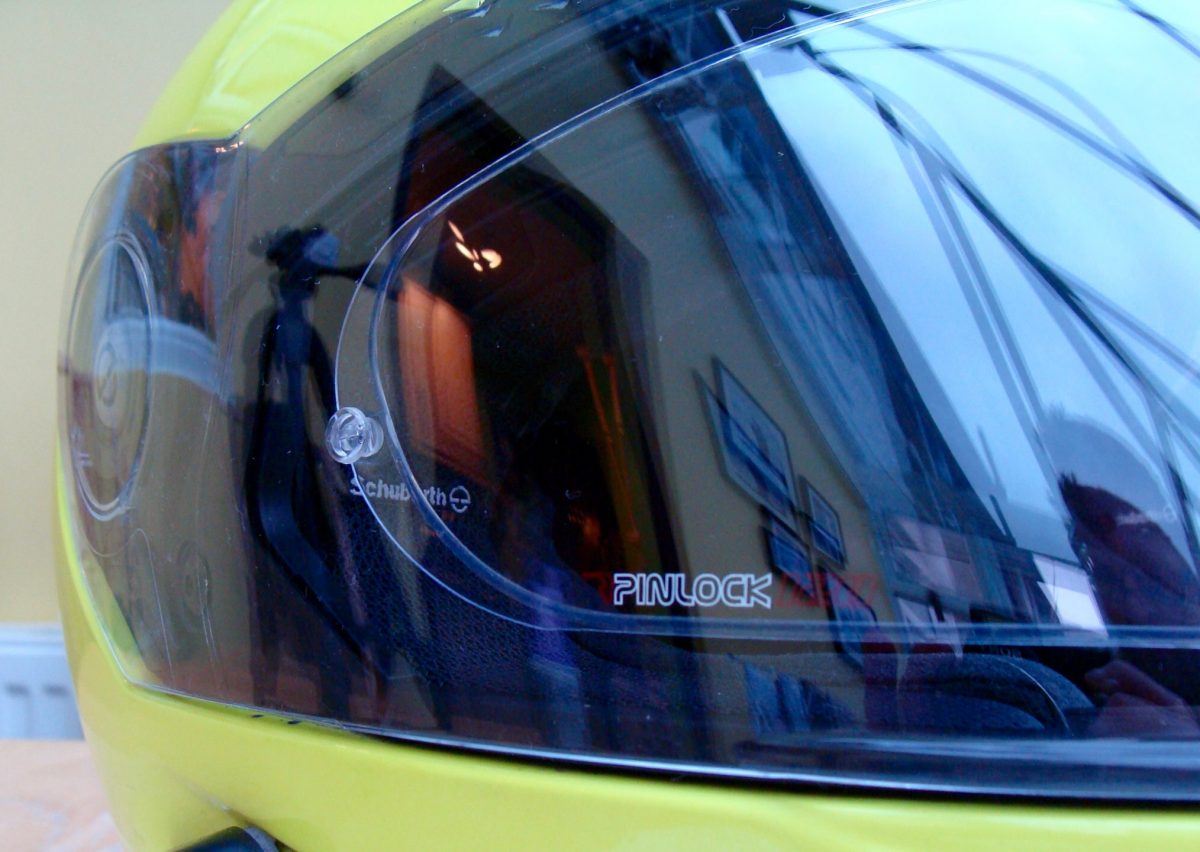
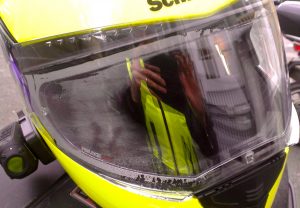 Pinlock visor inserts are definitely the dog’s bollocks for preventing a misted-up visor. Whether you ride in the winter, the wet or often set off early on brisk mornings; once you have a Pinlock, you don’t realise how much you rely on it – that is until it starts to fail. And a Pinlock visor fogging up is the most frustrating, as you can’t even wipe it clear when it’s misted inside…
From time to time your Pinlock will need a little TLC to keep it working well and remaining mist free. This article explains how to remove, clean, and refit your Pinlock, as well as some tips on ensuring you maintain that crucial airtight seal.