 It seems every biker wants to be a video blogger these days, strapping a camera to their helmet/bike and recording their rides for all and sundry to watch on YouTube. And why not, decent HD camera are now very affordable and the evidence they gather can be invaluable if some idiot pulls out on you. Which, as we all know, happens far too often these days.
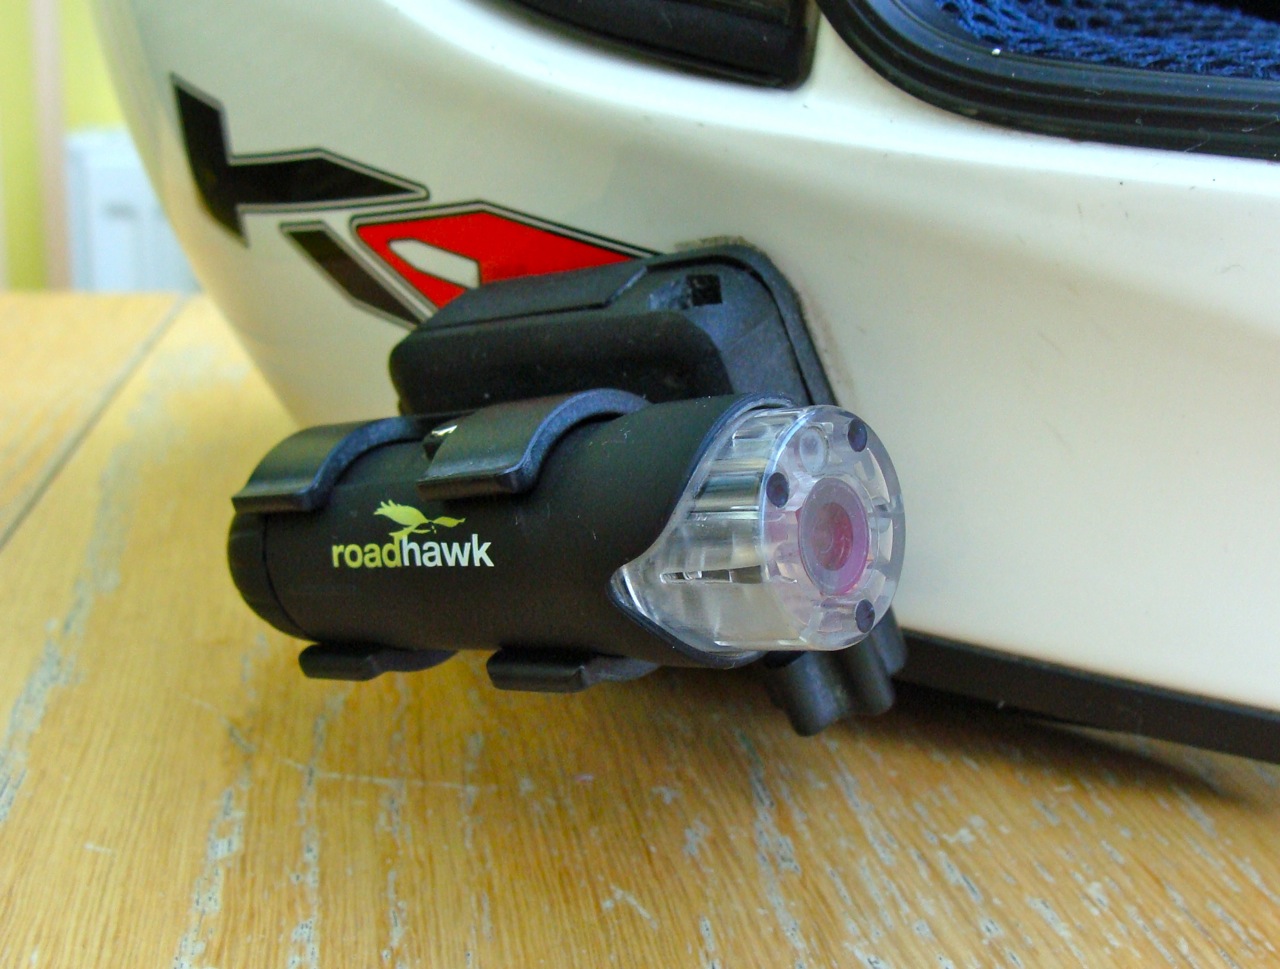
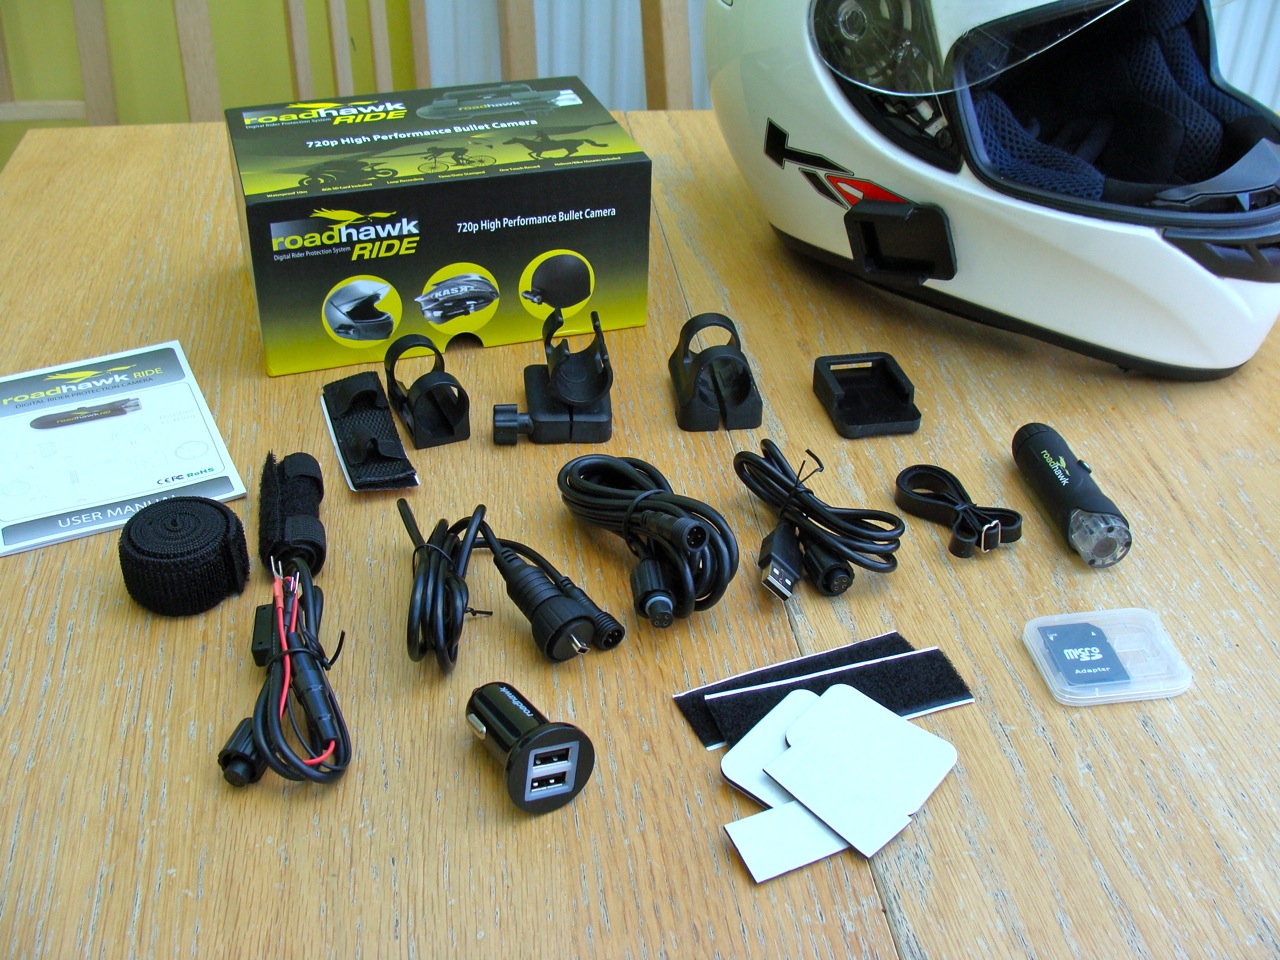
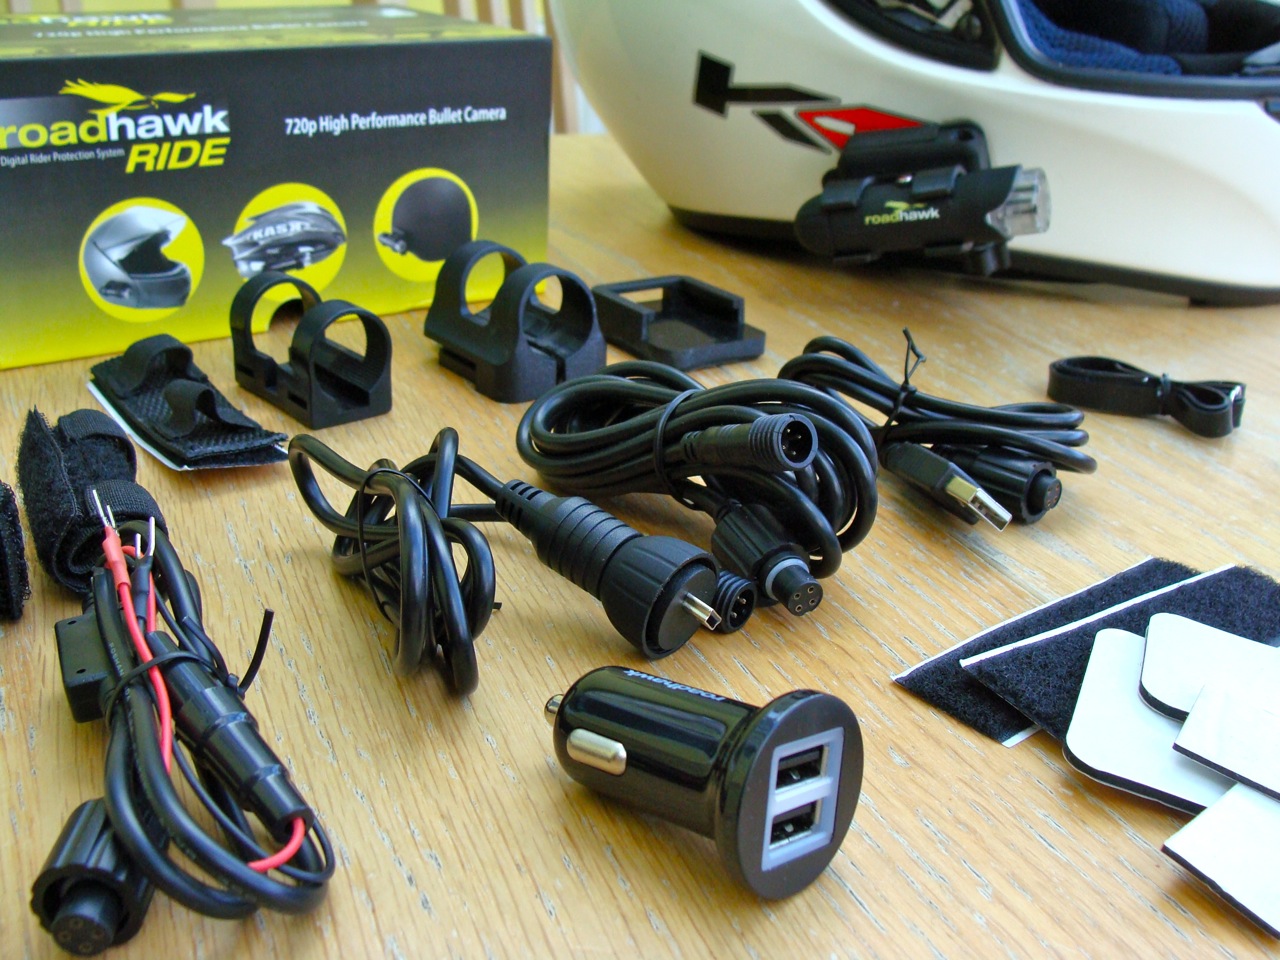
So back last autumn, I spotted this Roadhawk Ride![]() camera on special offer in Halfords and decided to join the vblogging band wagon. With the insurance claim from my incident in September turning sour as the third party falsified a witness, I only wish I had purchased a camera sooner. You will probably have seen some of the footage from this camera on my YouTube channel already, but after a few months of use, here is my proper write up. The Roadhawk RIDE is a dinky little cylindrical camera, just 80mm long and 25mm in diameter, that comes with a plethora of brackets for mounting it pretty much anywhere you like. The rear of the camera unscrews to reveal the memory card and USB socket.
camera on special offer in Halfords and decided to join the vblogging band wagon. With the insurance claim from my incident in September turning sour as the third party falsified a witness, I only wish I had purchased a camera sooner. You will probably have seen some of the footage from this camera on my YouTube channel already, but after a few months of use, here is my proper write up. The Roadhawk RIDE is a dinky little cylindrical camera, just 80mm long and 25mm in diameter, that comes with a plethora of brackets for mounting it pretty much anywhere you like. The rear of the camera unscrews to reveal the memory card and USB socket.
The Roadhawk RIDE records 720P HD video at 30fps. It’s supplied with an 8GB micro SD card, which will store about 2 hours of footage, however it’ll take up to a 32GB card, to store around 8 hours. Video is written to the card as sequential 5 minute MOV files, but what I like about the camera is how it will overwrite the oldest MOV file when it runs out of space, so you never have to worry about cleaning out old files. With a 32GB card in it, I know I will have the 1.5 weeks worth of video from my commute to work, no matter what. Although the camera records to MOV format, these files can’t be played natively by Quicktime. VLC will play them, but you will likely need to transcode them (with Handbrake for example) before you can import them into iMovie etc.
 All video recorded has a date time stamp embedded into the video in the bottom right hand corner. Perfect for insurance evidence, but unfortunately there doesn’t appear to be a way to disable this. Setting the time is also a little faff, as you have to write the time into a text file, save it to the memory stick, then when the Roadhawk is turned on, it will read it and set its internal clock.
There isn’t much in the way of controls for the camera, just one button on top, which you hold in to turn it on or off. That’s it! With no built in screen, the only feedback you get is through some coloured LED’s by the lens. The camera has it’s own internal battery or can be powered directly off a USB power supply. This is where the selection of rear covers comes into play. The standard one is completely sealed to make it water tight, there’s another with holes to allow the mic to pick up sound (no external mic jack I’m afraid), then finally another which has a USB power lead passing through it. Battery life isn’t long, barely an hour or so, but it does charge pretty quickly. For longer rides the supplied USB wiring is what you need and plenty is supplied: extension leads, fag socket adaptors, battery connections, all sorts. There a few different mounts too: one for flat surface, one for curved (e.g. helmet); each with interchangeable clips: one fixed, one large that can swivel.
 For the most part I’ve been riding with the camera stuck to the side of my helmet, with the swivel mount, Due to the angle of my helmet, I couldn’t get the video feed horizontal with the horizon with the more flush and discreet fixed mount. With my commute being around 40 minutes I have had to get into the habit of charging the camera at work and in the evenings. No big deal, but it can be very annoying if I ever forget. When powered via USB the camera will automatically startup and being recording, which lend it perfectly for a semi-permanent installation where you just forget about it until your next SMIDSY.
The video quality is excellent in the day. Even at night with a lot of glare from headlights it’s still very good, although number plates can be tricky to make out. There is no settings that can be tweaked, like exposure or what have you. It is entirely auto-adjust, but it does do a pretty damned good job nonetheless. Footage is recorded at 30fps and was always smooth. Where the camera does get unstuck is in wet or misty conditions. With moisture on the lens you get horrible distortion and it becomes nigh impossible to make things out. Not really much you can do about this, I tend to just get into the habit of giving it a quick wipe now and again.
Pros:
- Small and compact
- Reasonably cheap compared to competition
- Good quality footage, night and day.
- Auto-power on and auto-loop, fit and forget features.
- Generous selection of mounts, wire and connectors included.
Cons
- Short battery life
- Can’t disable timestamp
- Can’t tweak camera settings (exposure etc).
- No external mic jack.
- Not 1080p
Overall, I’ve been very happy with the Roadhawk Ride and can definitely recommend it. It’s a good camera, at a good price. It may not have all the fancy features of a GoPro or Drift, but it’s smaller in size and makes a lot smaller dent on your wallet.
Rating 4/5.
Read full spec on RoadHawk website
Buy the Roadhawk Ride from Amazon![]()
Addendum
The memory stick for the RoadHawk Ride needs to be formatted as FAT32 with 32Kb / cluster. Through trial and error, it seems to only support 512 bytes per sector and 64 sectors per cluster. Failure to format it appropriately will lead to a fast flashing blue light, or a solid blue light followed by solid red then the camera turning off.
On Windows you must select an ‘allocation unit size’ or 32 or 64 kilobytes.
Default formatting on Mac OSX Disk Utility doesn’t achieve this either. One workaround is to resort to the command line:-
First run df (disk free) to ascertain what drive is your memstick and where it is mounted:
$ df
Filesystem    512-blocks      Used Available Capacity  iused    ifree %iused  Mounted on
/dev/disk0s2   623463232 483939600 139011632    78% 60556448 17376454   78%   /
/dev/disk1      61816000     44352  61771648     1%        0        0  100%   /Volumes/ROADHAWK
Next we need to umount it, but not eject it:
$ sudo diskutil unmount /Volumes/ROADHAWK/
Finally we format it (correct for a 32Mb card):
$ sudo newfs_msdos -v ROADHAWK -S 512 -c 64 -m 0xf8 -F 32 /dev/disk1
3 replies on “RoadHawk RIDE Video Camera Review”
Thank goodness for your post. I was beginning to think my Roadhawk Ride had gone wrong until I realised (with your help) that the information in the manual regarding formatting on a Mac was nonsense. Cheers!
On the off-chance it helps others, I have found a slightly easier way of formatting the SD Card on a Mac – use the official SD Associations’ SD Card Formatter tool which can be downloaded from: https://www.sdcard.org/downloads.
great camera, but the hardwire kit ceased to work and I have been unable to locate one so far , all stores are out of stock and do not know when they will be able to get more stock which means the camera is only good for short journeys due to battery going flat .many bikers i have spoken to have the same problem with the hardwire kit failing.