 For the last few months, I have been using the rather good RoadHawk Ride bullet action camera (read my review here). It’s a fairly cheap and cheerful camera, that works well and is great for capturing footage for insurance claims. However, one of the biggest issues I’ve had is the battery life, I only get about an hour of use before it’s flat. Although plenty long enough for my regular commute to work and back (I charge it at my desk during the day), it is frustratingly short when heading on a longer ride out.
The Ride is supplied with an assortment of cables and adaptors, including wires to run from a USB socket and directly from a 12V power feed. Better still, the Ride will automatically start recording on receiving power and automatically stop recording when power is cut. Along with its auto-looping feature, it’s perfectly feasible to hard wire it to the bike and literally just forget about it, which is exactly what I recently did.
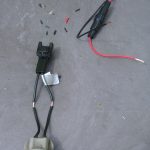
I chose to tap power from the side lights on my bike, such that the Ride would only record when the ignition is on. On the Fazer, this was dead simple as the wire to sidelights can be unclipped from the loom so all the awkward stripping of wires and soldering could be done away from the bike. The last thing you want to do is melt a hot soldering iron through the plastic fairing!
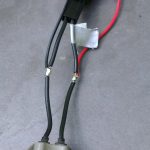
The first step was to strip the insulation away from a segment of the wires, preferably without cutting the core. Then I confirmed polarity with a multi-meter, twisted the leads for the Ride around and soldered them together. I then wrapped each wire in some heat shrink wrap and then finally wrapped some self-amalgamating tape
 around the lot. The heat shrink wrap was tricky as I had to cut this down the length and manually wrap it around, rather than threading each wire through it.
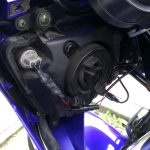
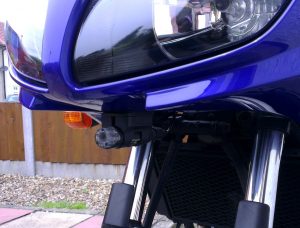
Finally, I used a supplied sticky pad to mount the camera underneath my front fairing. Only one mount is supplied that can accept the camera such, the others require the camera upside down due to the button on the camera. Annoyingly the 12V wire terminates in an extension lead connector, which then goes into a USB lead, so I had over a metre of wire to wrap up and tuck away in the fairing.
In use, I came across a number of issues with the camera in this position. It picks up a lot of vibration, the audio is horribly raspy and the recording keeps cutting out randomly. Although oddly, the cutting out has become a great issue more recently. Maybe it’s the vibration that is causing the SD card to come loose, maybe there’s a fluctuating power supply coming from the bike, or maybe just not enough current and thus it’s relying still on the battery.
When it records from this position, the footage is less jerky and smoother due to no fast movement from your head. Obviously, it doesn’t show any lifesaver glances you make, when you use indicators or your speedo, all of which may be useful in an insurance claim. However, I found the low-down position is much better at capturing registration plates on other cars. Overall, it’s swings and roundabouts, but it’s good to have somewhere to plug the camera in to charge and continue to record when on a longer ride.