Categories
Maintenance

Servicing Forks Down at OMC

Servicing Forks on Fazer
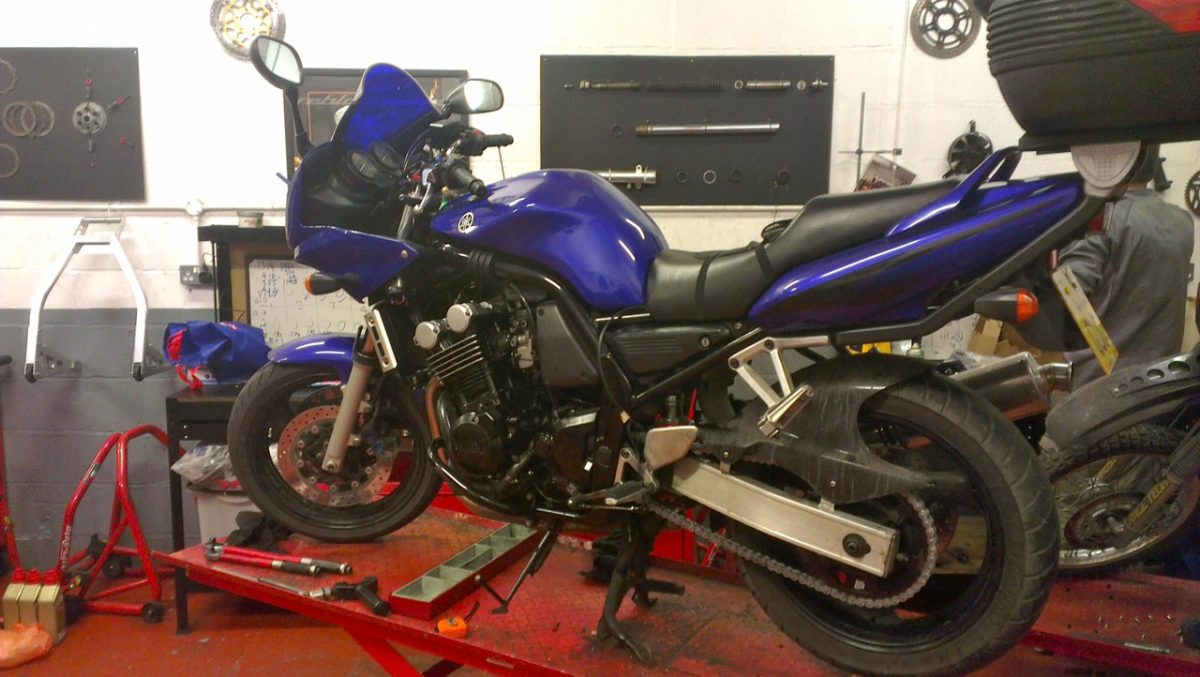
Yesterday afternoon I was down at Oval Motorcycle Centre (OMC), again, giving my forks a good service. The seals had recently gone and were leaking a lot of oil onto the stanchions and more worryingly down towards the wheel, brake discs and calipers. Not so good.

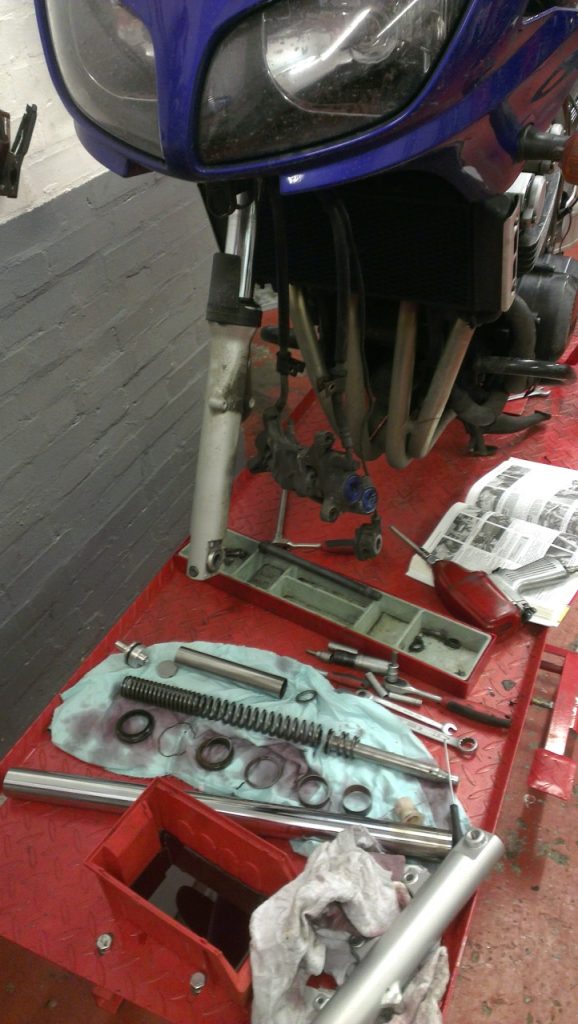
Stripping the forks down is not a simple job for a newbie, however with the expert guidance of Matt at OMC, I was able to perform the majority of the work and learnt an awful lot along the way. I splashed out on genuine Yamaha oil and dust seals, after being warning away from poor quality pattern parts. New circlips also went on, as the old ones were rather rusty. Oil wise, I opted for standard spec 10w, purely to gauge what the bike is like as standard, before changing things. However many Fazer owners prefer 15w oil to firm up the front end and reduce diving.

The Fazer feels a lot better to ride now,  definitely gives me more confidence in it’s handling. Perhaps some tweaking of preload settings could improve things further, something I’ve not tweaked about with yet. But that’ll be another day, maybe OMC’s Suspension Setup clinic…

Categories
Maintenance

Down at OMC Sorting Chain, Sprocket and Shock

OMC-ChainSprocketShock-Replacement-1What a productive day, down at OMC (Oval Motorcycle Centre). Booked myself a bench and with the expert help of OMC’s Matt,  I replaced the Fazer’s chain, sprocket and rear shock. Sure, I could have just dropped the bike off at a regular garage to do the work in a couple of hours, but down at OMC I not only got the work done well, but learnt how do it myself for the future.

Categories
Courses/Tuition Maintenance

A Night at OMC’s Basic Bike Maintenance Course

Last night I finally made it along to the Oval Motorcycle Centre’s (OMC) Basic Maintenance and Inspection Course. Something I’ve been meaning to do for some time, but never got round to it. The course covers all the basics of bike maintenance, starting with electrics (switches/lights), then blitz’s through, tyres, brakes, bearings (wheel, head race & swinging arm), chain, forks/shocks and finally control levers and cables.

Although the course is pitched at complete newbies, it covers an awful lot, such that even though I’ve done quite a few maintenance jobs (changing filters, downpipes, balancing carbs etc) I still came away having learnt much. From stuff as simple as a more efficient way to lube my chain, to stuff completely new to me, like the ins and outs of different head race bearing and spotting when they’re knackered. It was also a great chance to ask questions on simple stuff you’ve seen, but were never sure if it was OK or not, like the way you hear brakes pads catching slightly as you push a bike – are they supposed to do that or are they sticking?!  (They’re supposed to)

Categories
Maintenance Videos

Replacing Air Filter on Yamaha Fazer FZS600

A key item on the regular service schedule is the replacement of the air filter. On my FZS600 2003, this is due every 6000 miles or every year (whichever is the soonest). This year, however, I decided to fit a K&N reusable filter, slightly more expensive but it should pay for itself after a couple of years. The Fazer 600 is known to run slightly on the rich side, so the increased airflow from a K&N should balance this out.

Here’s a quick video run-through of how to replace the filter. It’s an easy task that you all should be able to tackle, don’t be put off by having to remove the fuel tank.

YouTube player

Tools required are minimal: an 8mm socket, T30 Torx socket/alan key, Philips screwdriver and some needle pliers (to unclip fuel pipe).

Tips as you go along:

  1. Ensure you only have a small amount of fuel in the tank to keep it light when removing.
  2. Have some tissues/rags to mop up the drop of petrol that’s left in the loose fuel pipe.
  3. Don’t forget to turn back on the fuel tap before bolting down the tank afterwards!
Right Now on eBay Buy a K&N air filter off eBay
Loading...