 Totally gutted. Less than a month old pair of Michelin Pilot Road 5’s with a bloody screw stuck in the rear tyre. Very annoying, but it need not screw up your whole day, if you know how to temporarily plug a tyre, you can be on the move again with minimal delay. This how-to will step by step show you how to repair motorcycle puncture in your tyre with a temporary plug that will get you home or to a garage for a permanent repair.
The Repair Kit
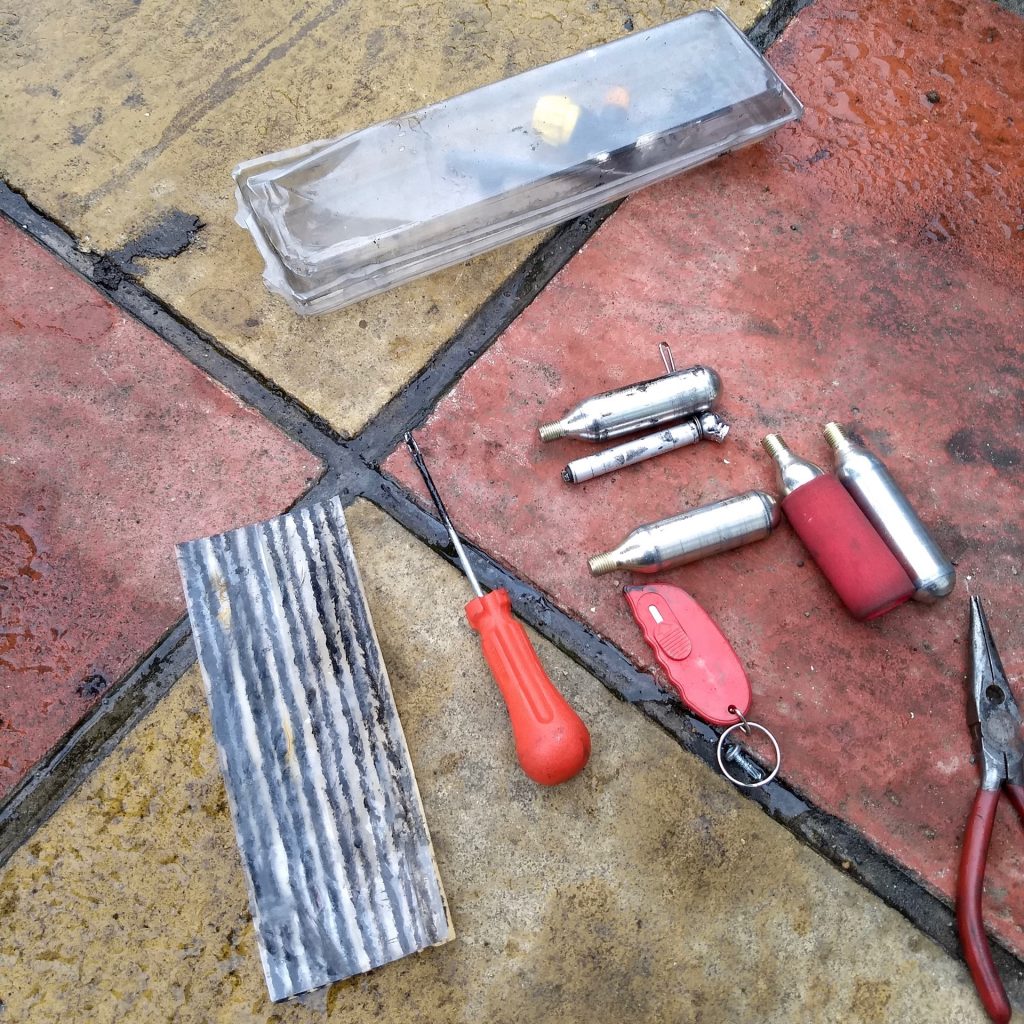
The motorbike puncture repair kit I have here contains rubbery strands and a large needle-like tool to thread them onto, for inserting into the hole in your tyre. Other variations exist, but they generally all share the same principle of shoving something rubbery into the hole to plug it. You should also pack pliers for pulling screws out, a knife for cutting the rubber strands and some CO2 canisters for inflating your tyre afterwards.
Many kits you buy come with a practical and decent-looking little bag, however the above fit the awkward space under the seat of my FZ6 alongside the under-seat exhaust… eBay is the cheapest place to buy your CO2 canisters (about £10-12 for ten).
Buy a Gear Gremlin Tyre Repair Kit from SportsBikeShop
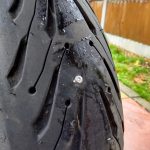
The Accused
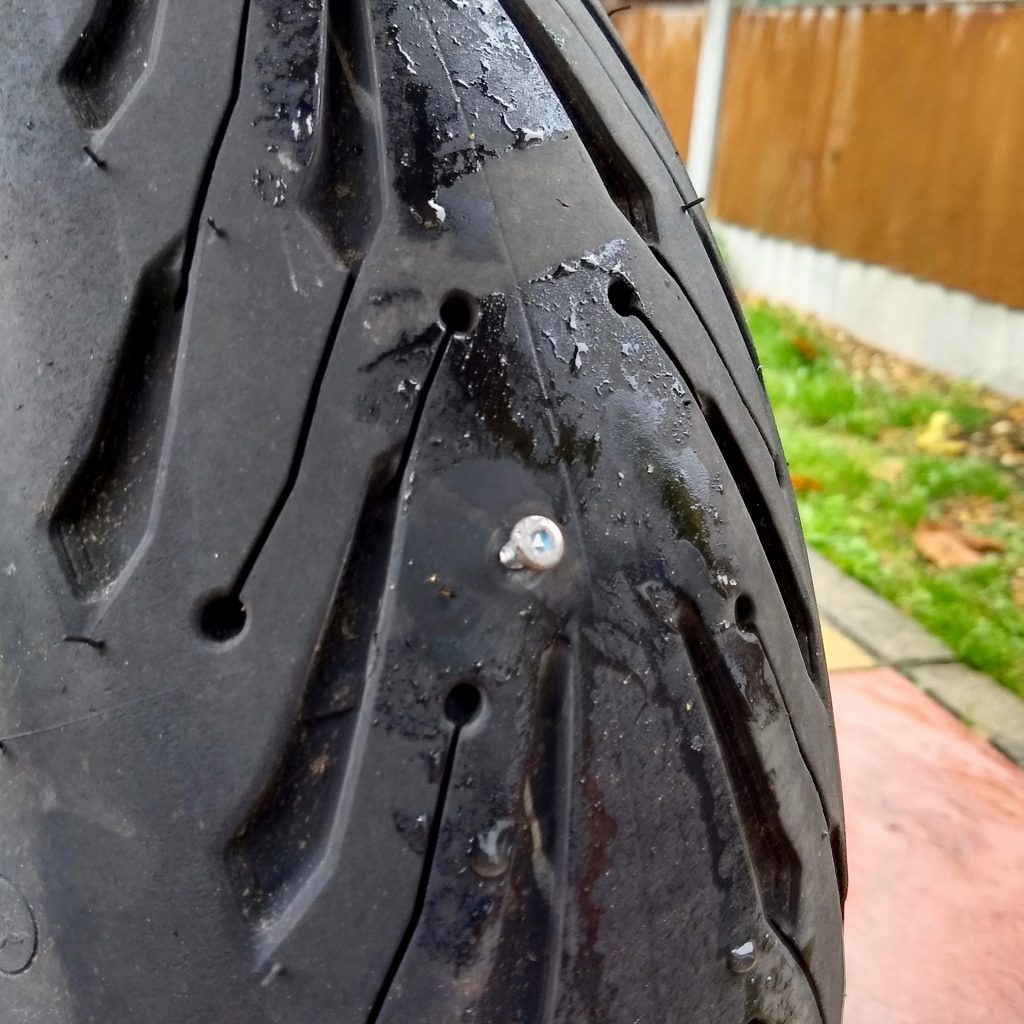
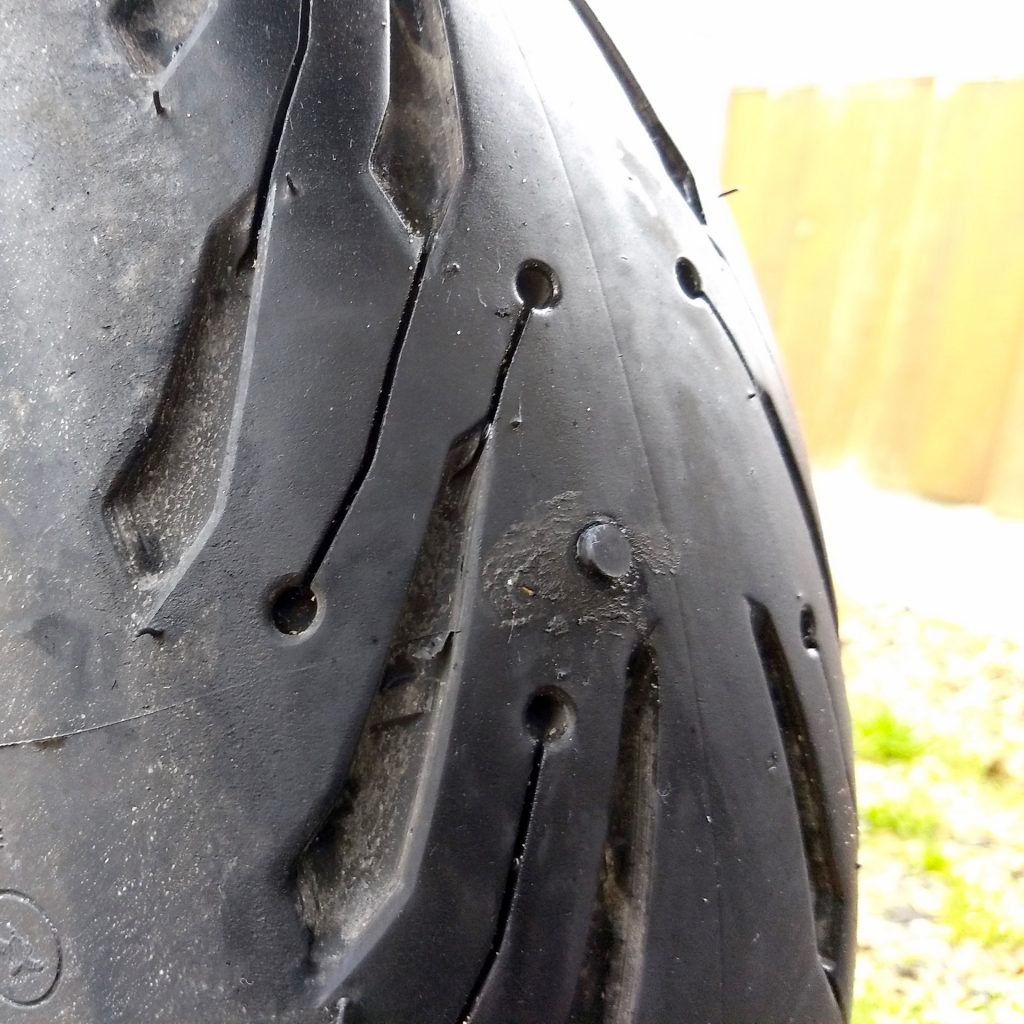
The offending screw. In this instance, the tyre hadn’t actually deflated, but as the screw is worn down and moves about, it could start losing air at any time.
The Repair Procedure
Now I’ll walk you through fixing motorcycle punctures using your roadside repair kit.
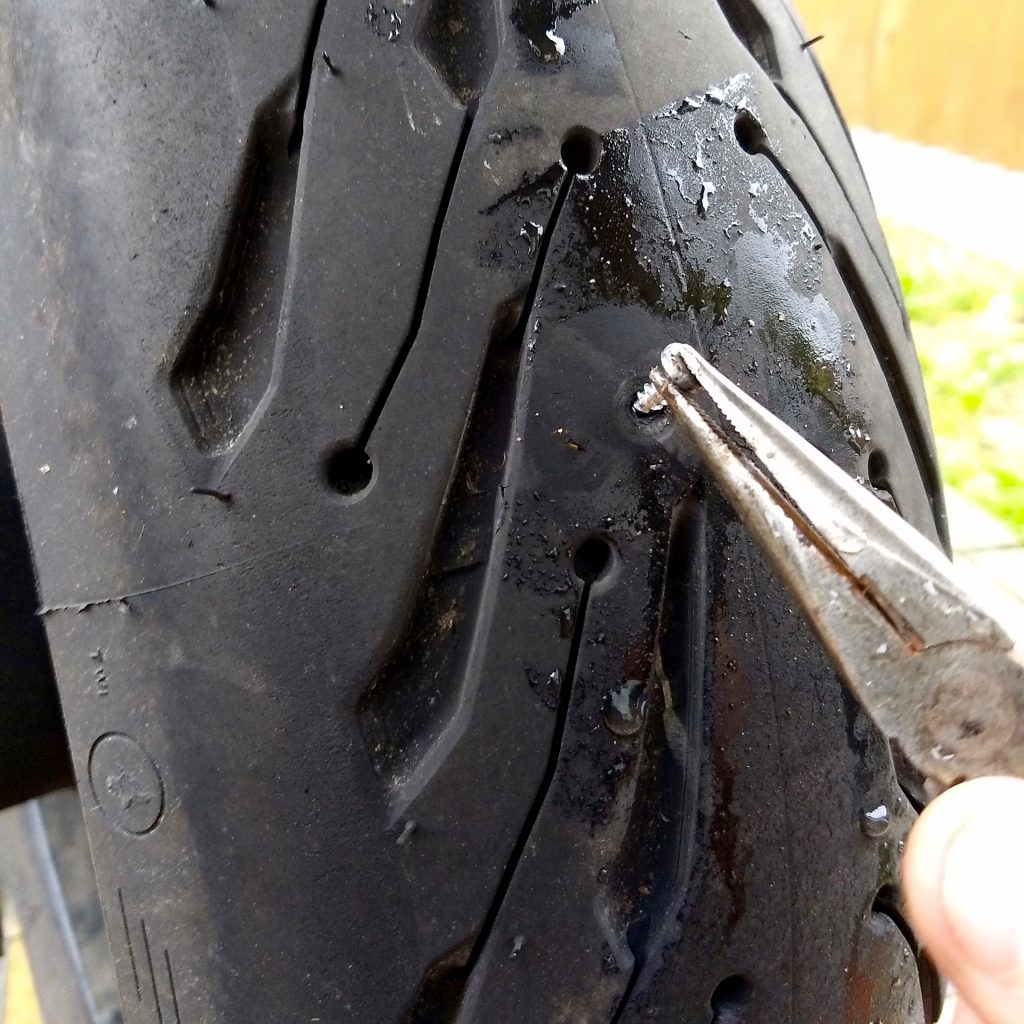
Using the pliers the screw is prised out, at which point the tyre will likely deflate. If not, double-check if there is air leakage by dabbing a spot of spit on the hole to see if it bubbles. You may get lucky and the hole is not deep enough to cause a puncture.
Some kits come with a tool to rough up the sides of the hole to afford better grip on the plug. If you have this tool shove it in and out a couple of times. It’s always worth confirming there’s no other debris still in the hole.
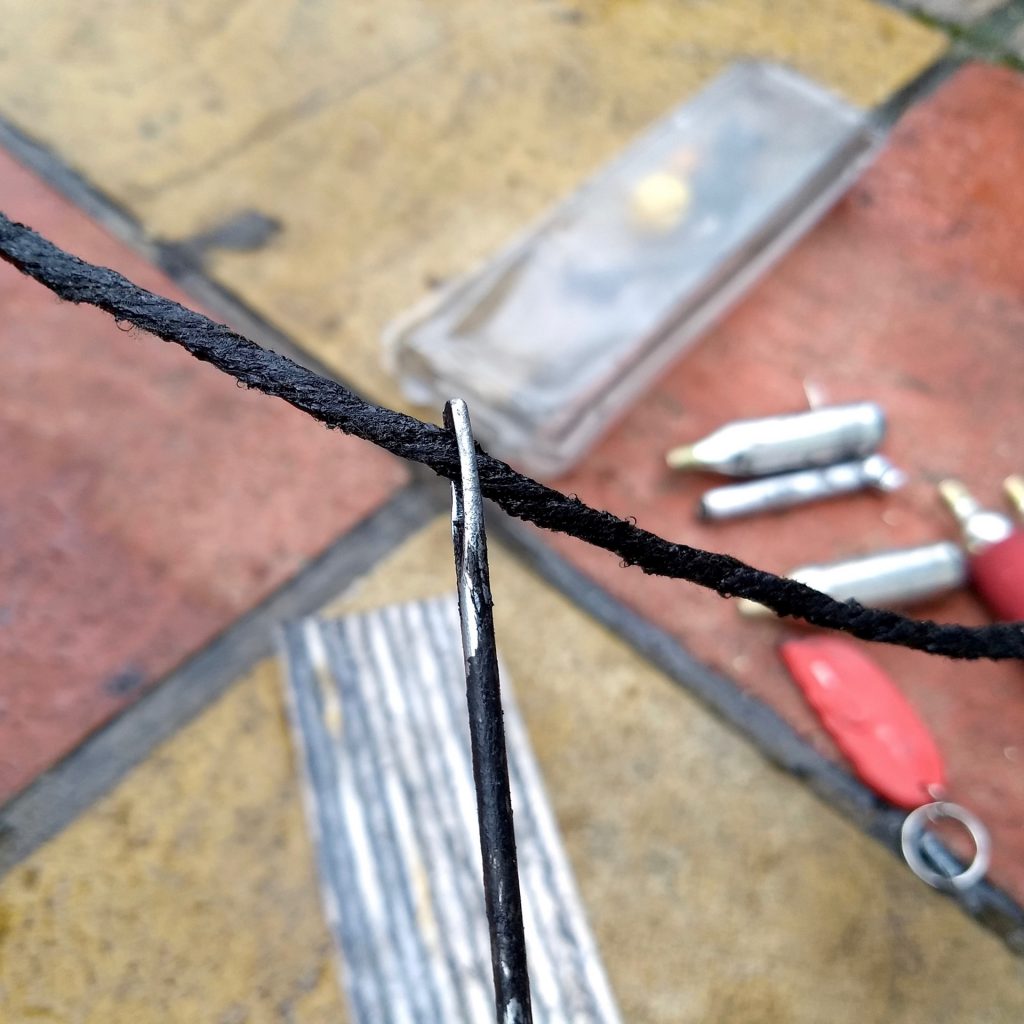
Next, we take one of the rubbery strands and thread it onto our needle-like tool. Pull it through (use pliers if needed) until the needle is halfway along the strand.
Poke the needle tool into the puncture hole. If your bike is on the centre stand, pop it into gear or onto the side stand to stop the wheel rotating as you try to press the needle in.
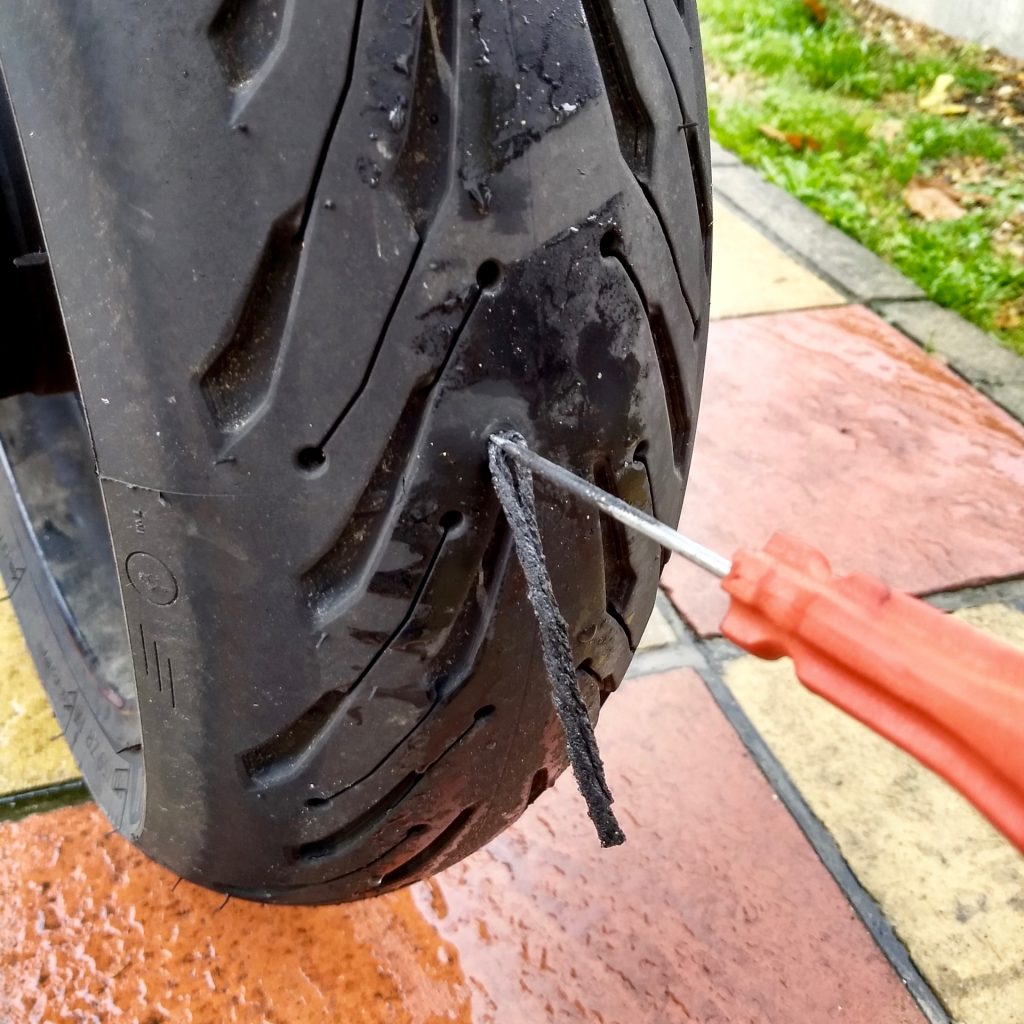
Push in until there are only a couple of centimetres of rubber strands left sticking out.
Slowly pull the needle tool out, until a couple of centimetres of strands threaded on the needle are sticking out. You’re aiming to keep a loop of rubber strands within the tyre and a little exposed on the outside.
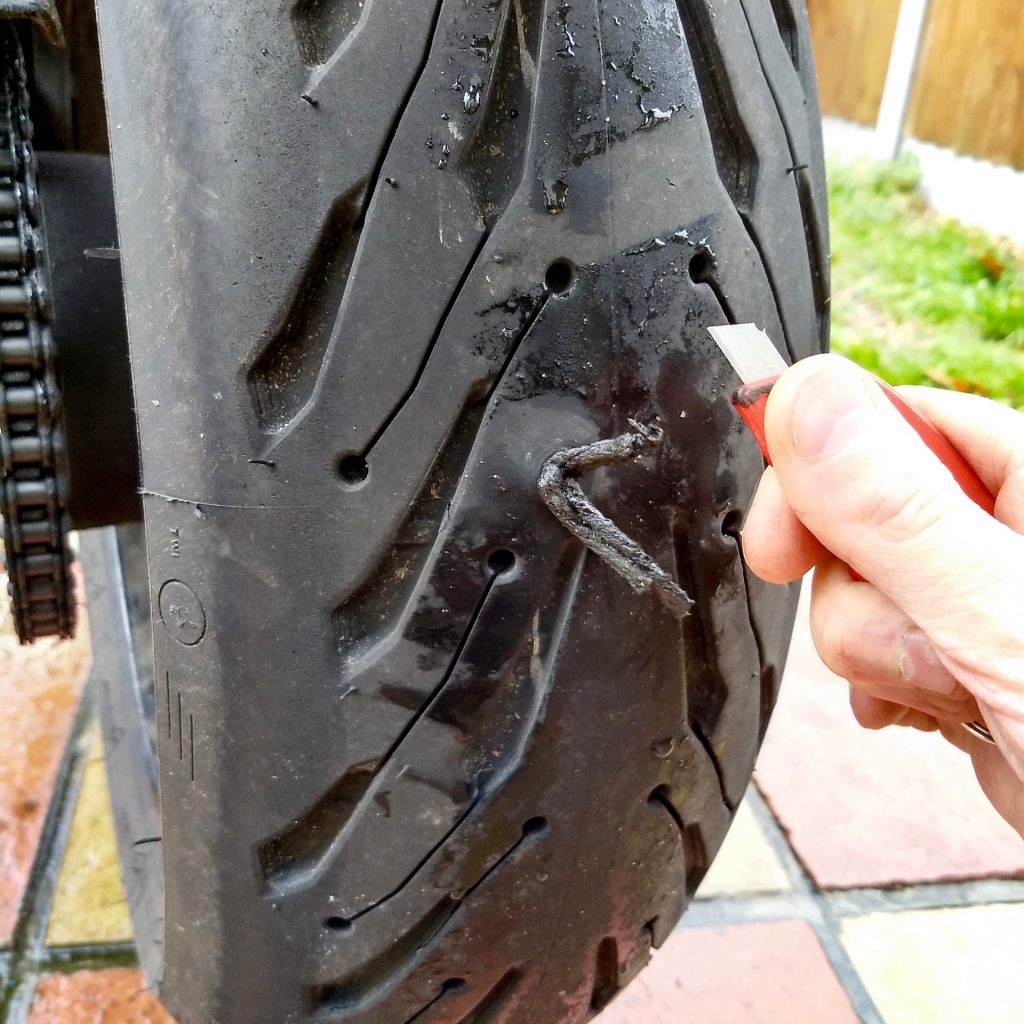
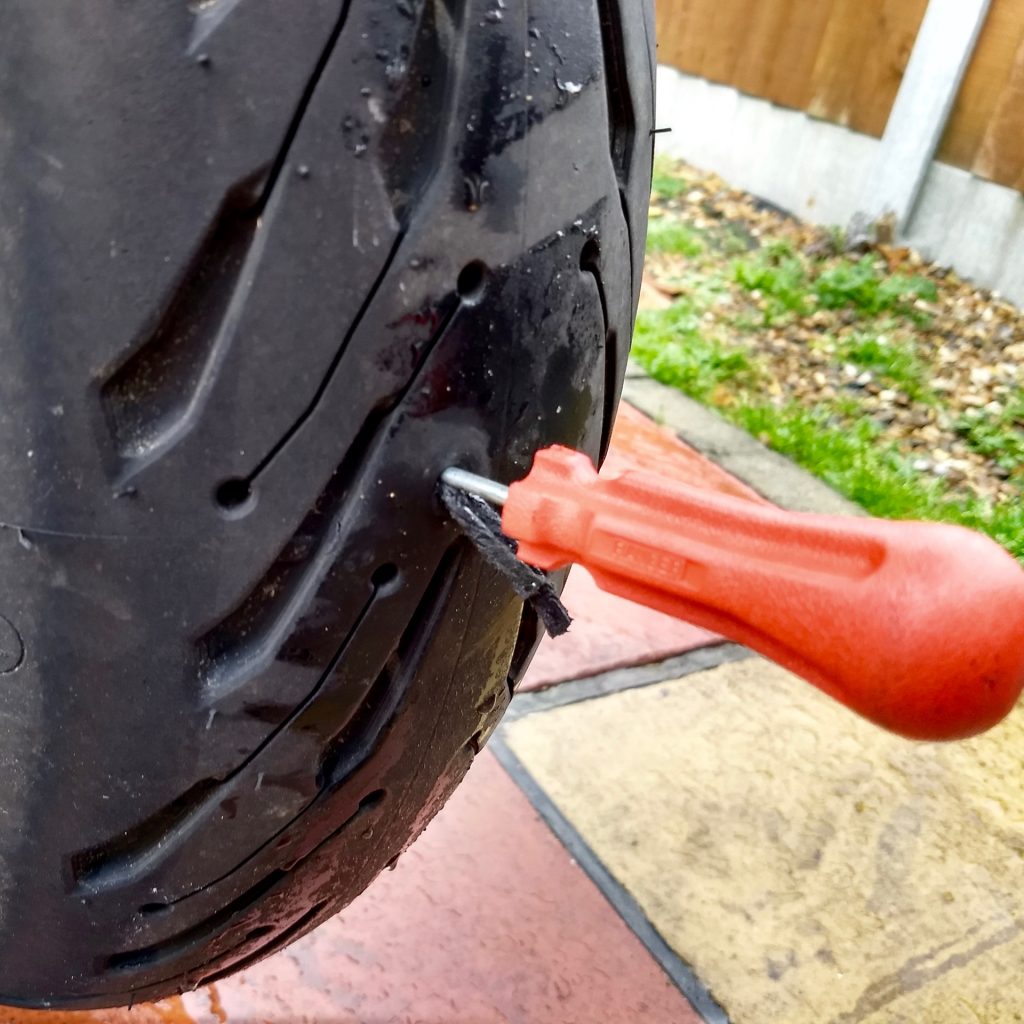
Use your knife to cut the strands from the needle, leaving the strands threaded into the tyre.
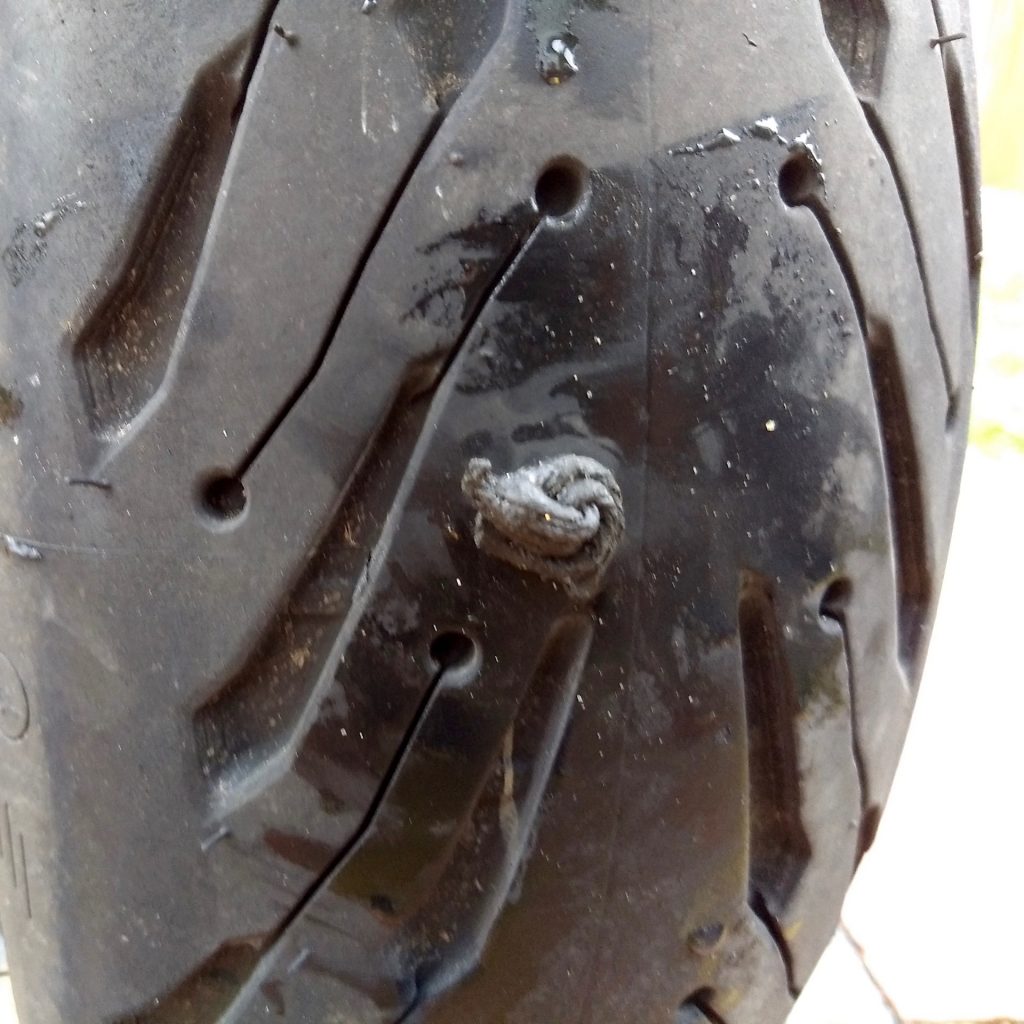
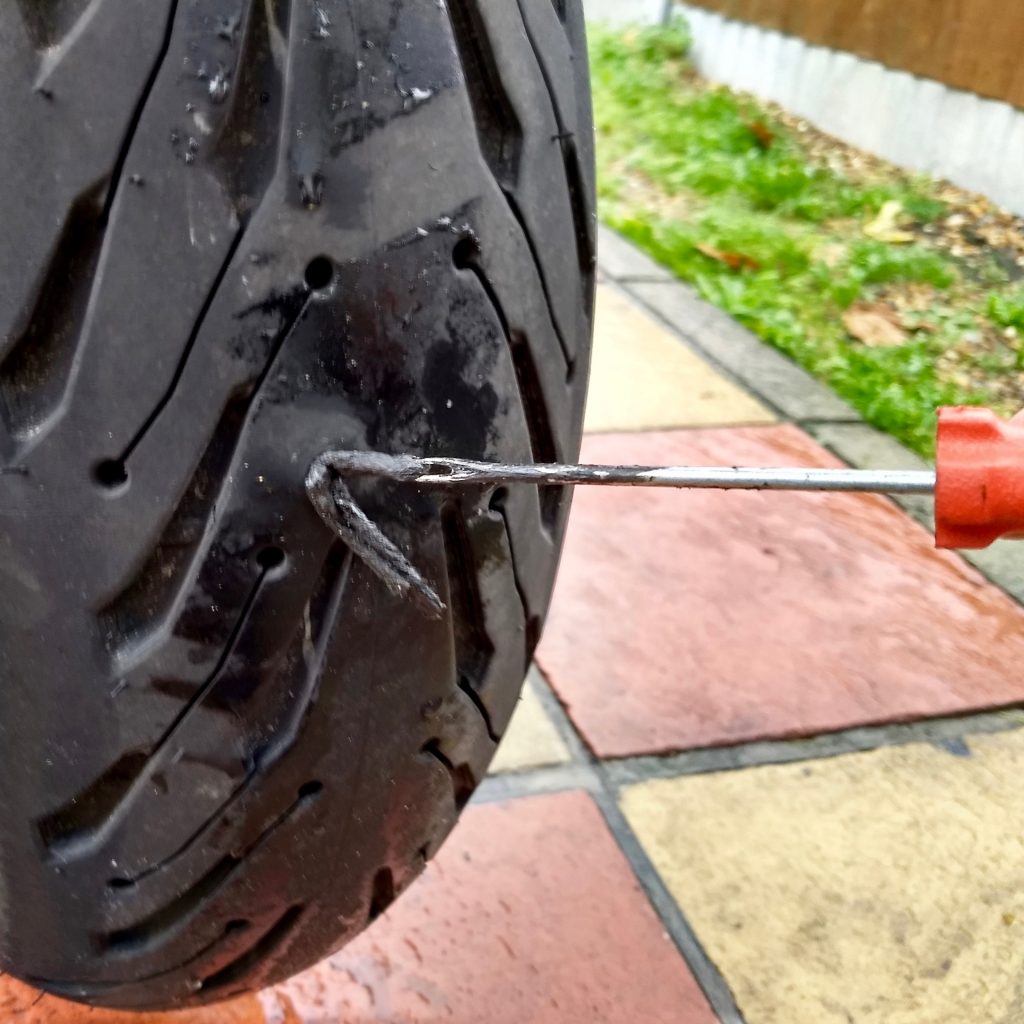
Finally, curl up the exposed strands into a ball. Hopefully, your tyre is now plugged.
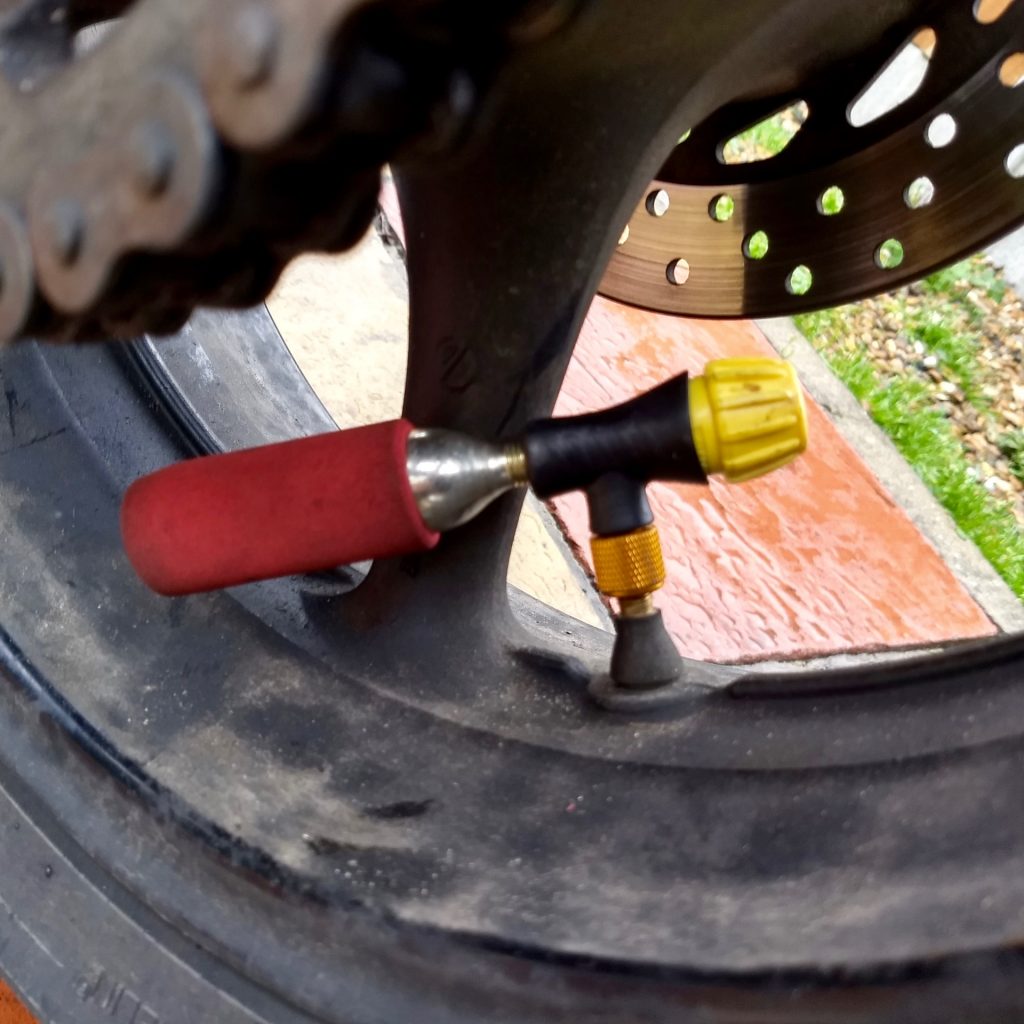
Inflate the tyre back up. CO2 canisters are great when out away from home or any nearby garages. Ensure the inflator valve is closed (big yellow thumb screw), and screw the canister in, puncturing it open in the process. Screw onto your tyre valve, then open the inflator valve (big yellow thumb screw) to release the air into the tyre. Remove or close the inflator valve before unscrewing the canister to avoid letting all the air back out! 2-3 canisters are usually enough to get a rear wheel rideable to a garage to correctly inflate to the required pressure. Mind the gas canisters get very cold when suddenly deflated.
After the first canister has gone in, you should be able to confirm if your plug worked. Dab spit on the repair or listen carefully to confirm it’s not leaking air. Large holes may need multiple strands or larger plugs.
The Permanent Repair
Do note any plug shoved into the tyre from the outside is just a temporary repair, recommended for no more than 50 miles and no faster than 50 mph. Get yourself to a garage for a proper permanent repair, usually, a mushroom plug glued to the inside of the tyre which cannot work its way out. This permanent repair should only set you back £25-30 (possibly less if you remove the wheel yourself) and should last the lifetime of the tyre and be safe for normal riding (perhaps not ideal for a track day though).